Hey there, email enthusiasts! Ever heard of SPF, DKIM, and DMARC and wondered what they’re all about? Well, you’re in for a treat today. We’re going to dive deep into these three biggies of email authentication, unravel what they do, and guide you on setting them up. Ready? Let’s jump right in!
The SPF Story
First on the list is SPF, or Sender Policy Framework. It’s the oldest and simplest of the three. Think of SPF as the bouncer at the club (your email server), checking the IDs (IP addresses) of anyone trying to get in (send an email).
How does it do this? By using DNS records. Your SPF record might look something like this: v=spf1 ip4:123.123.123.123 ~all. In plain English, this means that only the server at IP address 123.123.123.123 can send emails with a FROM: user@example.com header. Setting up SPF is pretty straightforward. Just add a new TXT record with a valid SPF string to your DNS records through your domain’s control panel. It’s like giving the bouncer a list of VIP guests for the night.
DKIM Decoded
Next up is DKIM, which stands for “DomainKeys Identified Mail.” If SPF is the bouncer at the club, DKIM is the detective inspecting the authenticity of a VIP guest’s autograph (your email content).
DKIM uses a pair of keys: a private one that your email server uses to sign each outgoing email, and a public one added to your domain’s DNS records. When a recipient server gets your email, it uses the public key to verify that the email’s content hasn’t been tampered with. To set up DKIM, you’ll need to generate these keys and keep your private key a secret! It sounds like spy stuff, and honestly, it kind of is.
DMARC in the Mix
Last, but certainly not least, is DMARC (Domain-based Message Authentication, Reporting, and Conformance). If SPF is the bouncer and DKIM is the detective, DMARC is the club manager overseeing everything.
DMARC uses the powers of both SPF and DKIM and gives you control over what to do when emails fail these checks. Plus, it offers feedback – servers that get your emails will send reports about any emails that don’t pass the checks. To get DMARC working, you just add another DNS record for your domain.
Authenticating your emails in practice
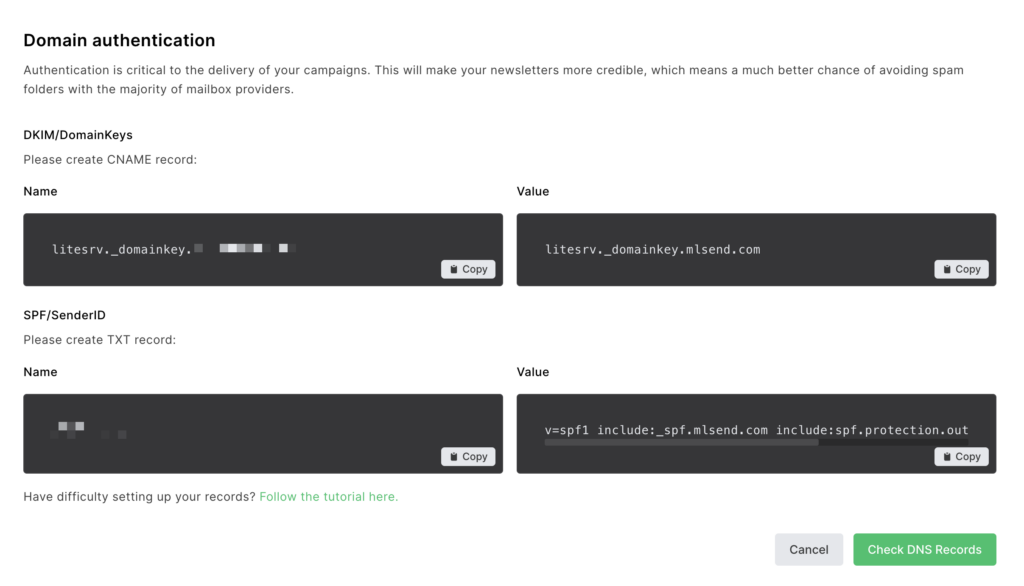
Now that we’ve got the theory down, let’s bring it into practice. Imagine you’re using MailerLite, and they serve you up a neat little screen filled with all these values. What do you do with them? Well, it’s as simple as a game of copy-and-paste! Transfer those precious strings straight into your DNS settings with your hosting provider. And just like that, you’ve boosted your email authentication game. Easy peasy, right?

Wrap Up
Alright, email fans, that’s a wrap on SPF, DKIM, and DMARC. It might seem a bit techy, but setting these up is a game-changer for your email security and deliverability. So go ahead, give your email server a security upgrade and let these three musketeers guard your domain’s reputation. And as always, keep sending those awesome emails!


